ToDo List - CSCI E-180 - Project 1 - Philipp Hanes
(I was unable to get the standard printscreen functionality in Windows XP to capture either the tooltips I used, or the mouse cursor position. Pretty much everything you see on the screen has a tooltip associated with it, which is displayed when the mouse bursor is over the item in question.)
There's no "flow" as such, in that as much as possible is designed to be directly interacted with.
When a user first creates a new list, a default tutorial list is presented for modification.
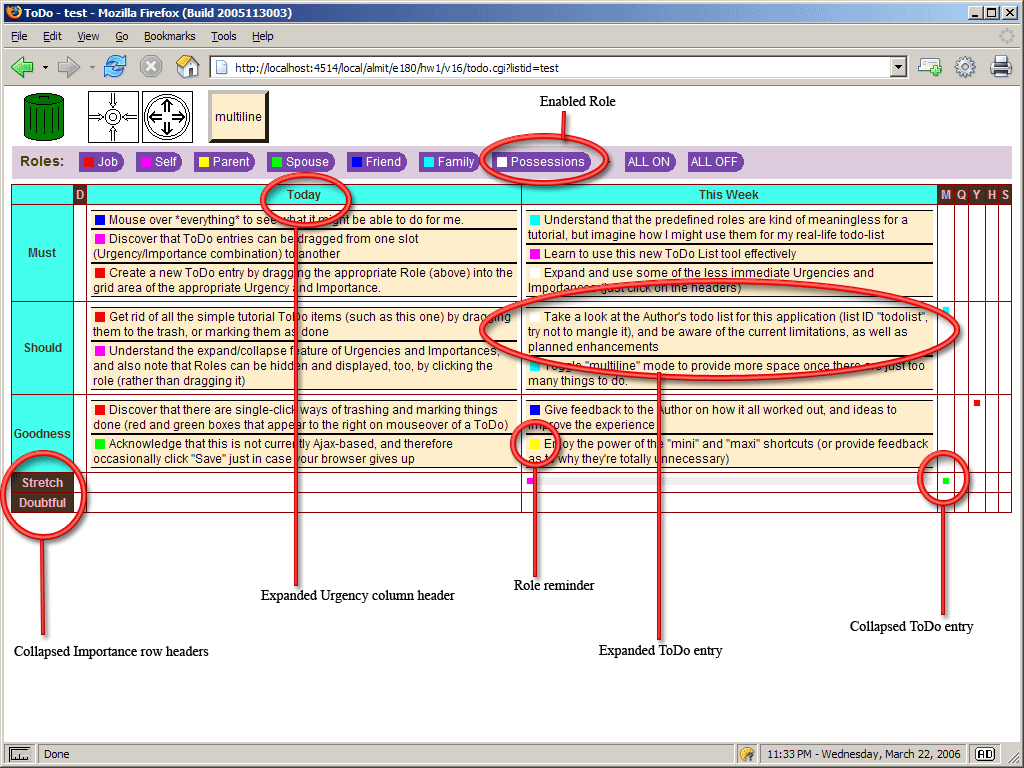
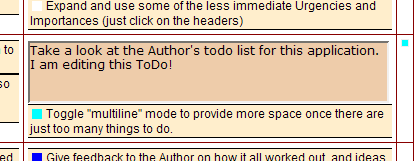 Existing, expanded ToDo entries may be edited by clicking on them and typing into the text area that replaces the existing item.
Editing is considered complete when the ENTER key is pressed, or the textarea loses focus.
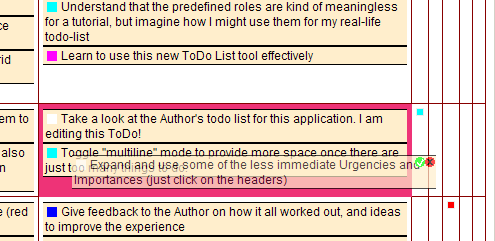 Existing, expanded ToDo entries may be moved to another part of the grid by dragging them there.
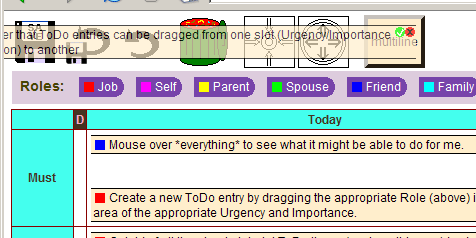 They may also be dragged to the trash can to dispose of them entirely. Note how the trash can visually indicates it will accept this item.
 There are shortcuts that made visible when the mouse is over a ToDo entry. They allow quick, single-click trashing of the entry, or marking it "Done" (which moves it to the "Done" column).
Note that there is helpful visual indication when these affordances are hovered over with the mouse cursor.
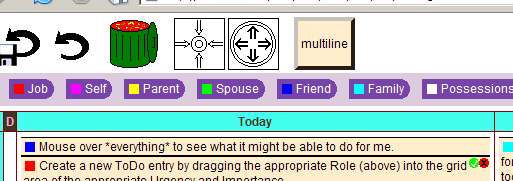 Over the black "X" in the red circle.
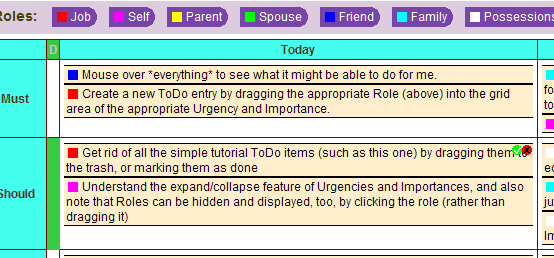 Over the white check mark in the green circle.
 New ToDo entries are created by dragging the Role the new entry is associated with to the appropriate place in the grid.
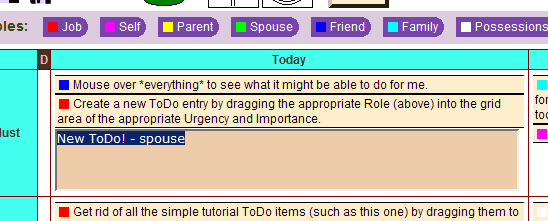 Immediately upon dropping it, a textarea is created with some default content that can be modified. (it is all selected so any typing will replace it)
The toolbar area across the top of the window contains the following:

- A "Save" button and a "Revert" button, both of which only appear after a change is made to the initially-loaded data. "Save" writes all changes back to the server, while "Revert" throws out all changes made since the last save.
- An "Undo" button which allows the user to undo a single move or trash operation. It only appears after an undoable action has occurred.
- The "Trash" icon, which can have ToDo entries dropped on it to throw them out. It changes when an entry is over it and releasing the mouse button would trash that entry, and also when the mouse cursor hovers over an entry's trash shortcut ("X" in a red circle)
- "Minimize" and "Maximize" buttons, and the "Multiline" toggle button. These three will be explained later.
In order to be able to focus on specific subsets of the ToDo list when there are many entries, there are a number of ways that ToDo entries can be hidden to allow more space and attention to be dedicated to the ones that are currently of interest:
In the following image, the "This Week" and "This Month" columns are expanded, while all the other ones are collapsed. Clicking on any column or row header will toggle the state of that column or row to the opposite state.

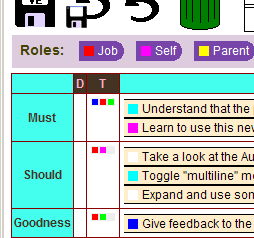 Collapsed rows and columns are still visible, and are valid targets for both dropping Roles for new Todo entry creation and dropping existing entries. They contain small representations of all the entries associated with them, which will display their text in a tooltip if the mouse cursor is hovered over them.
 All ToDo entries associated with a given Role can also be collapsed, to allow focus on other Roles. This is done by clicking on the Role. It will toggle the state of all entries associated with it. There are shortcuts to toggle *all* Roles on or off at once, as well.
ToDo entries that are collapsed for this reason are displayed the same way as if they were collapsed because the row or column they are in were collapsed.
Collapsed Roles are visually distinct, and can not be dragged to create new ToDo entries.
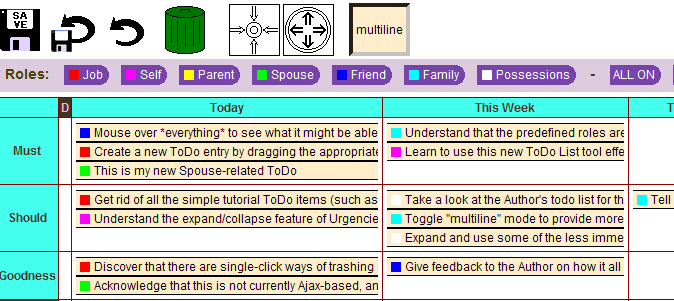 The "Multiline" toggle button in the tool bar allows for an overview of ToDo entries without letting verbose entries dominate the available real estate. Normally, either an entry is collapsed, and represented only by a small colored square, or it is entirely expanded. Toggling "Multiline" offers a display setting where only the first line of each entry is visible, and it is truncated (still available via tooltip on mouseover).
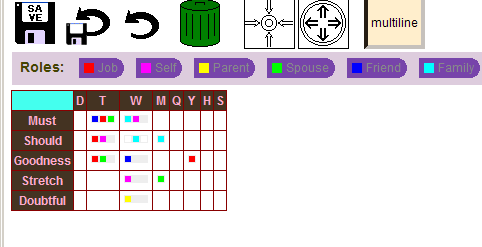 The "Minimize" and "Maximize" buttons, mentioned previously, are shortcuts to completely collapse or expand everything that supports this option, respectively. Minimize also forces the "Multiline" option off, and "Maximize" forces it on.
"Minimize" isn't really all that useful on its own, but it's a good starting point to then expand only one or two columns and rows and Roles, and not have to individually collapse all other ones.
Being collapsed for any reason overrides being expanded. So if any of the three attributes associated with an entry (Urgency, Importance and Role) are collapsed, the entry is collapsed.
Philipp Hanes

 Existing, expanded ToDo entries may be edited by clicking on them and typing into the text area that replaces the existing item.
 Existing, expanded ToDo entries may be moved to another part of the grid by dragging them there.
 They may also be dragged to the trash can to dispose of them entirely. Note how the trash can visually indicates it will accept this item.
 There are shortcuts that made visible when the mouse is over a ToDo entry. They allow quick, single-click trashing of the entry, or marking it "Done" (which moves it to the "Done" column).
 Over the black "X" in the red circle.
 Over the white check mark in the green circle.
 New ToDo entries are created by dragging the Role the new entry is associated with to the appropriate place in the grid.
 Immediately upon dropping it, a textarea is created with some default content that can be modified. (it is all selected so any typing will replace it)


 Collapsed rows and columns are still visible, and are valid targets for both dropping Roles for new Todo entry creation and dropping existing entries. They contain small representations of all the entries associated with them, which will display their text in a tooltip if the mouse cursor is hovered over them.
 All ToDo entries associated with a given Role can also be collapsed, to allow focus on other Roles. This is done by clicking on the Role. It will toggle the state of all entries associated with it. There are shortcuts to toggle *all* Roles on or off at once, as well.
 The "Multiline" toggle button in the tool bar allows for an overview of ToDo entries without letting verbose entries dominate the available real estate. Normally, either an entry is collapsed, and represented only by a small colored square, or it is entirely expanded. Toggling "Multiline" offers a display setting where only the first line of each entry is visible, and it is truncated (still available via tooltip on mouseover).
 The "Minimize" and "Maximize" buttons, mentioned previously, are shortcuts to completely collapse or expand everything that supports this option, respectively. Minimize also forces the "Multiline" option off, and "Maximize" forces it on.